Iceland photography guide — planning, locations, and technique
When is the best time to photograph Iceland?
Late August to mid-October is the peak for landscape photography — golden autumn light, reasonable weather, and the first aurora opportunities. Late February to April is the second best period, combining winter landscapes with returning light and longer golden hours. June–July offers the midnight sun and 24-hour shooting windows, but the sky stays pale and flat all night.
Iceland’s photography calendar
Iceland rewards photographers differently in each season. Understanding what each period offers — and what it does not — saves you from disappointment and helps you plan around your specific goals.
Late August to October (recommended for most photographers)
The autumn equinox period combines several advantages: long golden hours, possible aurora from mid-September, landscape colours (arctic heather, yellowing grasses, red-berry shrubs), and weather that is challenging but rarely extreme. The midnight sun has faded enough for proper darkness and stars by late August.
October specifically stands out: golden birch trees near Þingvellir, first snowfall on highland peaks, and 12–15 hours of darkness for aurora hunting. Waterfalls run full from summer glacial melt.
November to January (specialised winter photography)
Short days, long dark nights, potential for snow-covered landscapes. The advantage is the extended golden hour — in December, the sun rises at 11:00 and sets at 15:30, giving only 4 hours of daylight but those hours are almost entirely warm side-light. The disadvantage: frequent storms, low visibility, and challenging driving conditions.
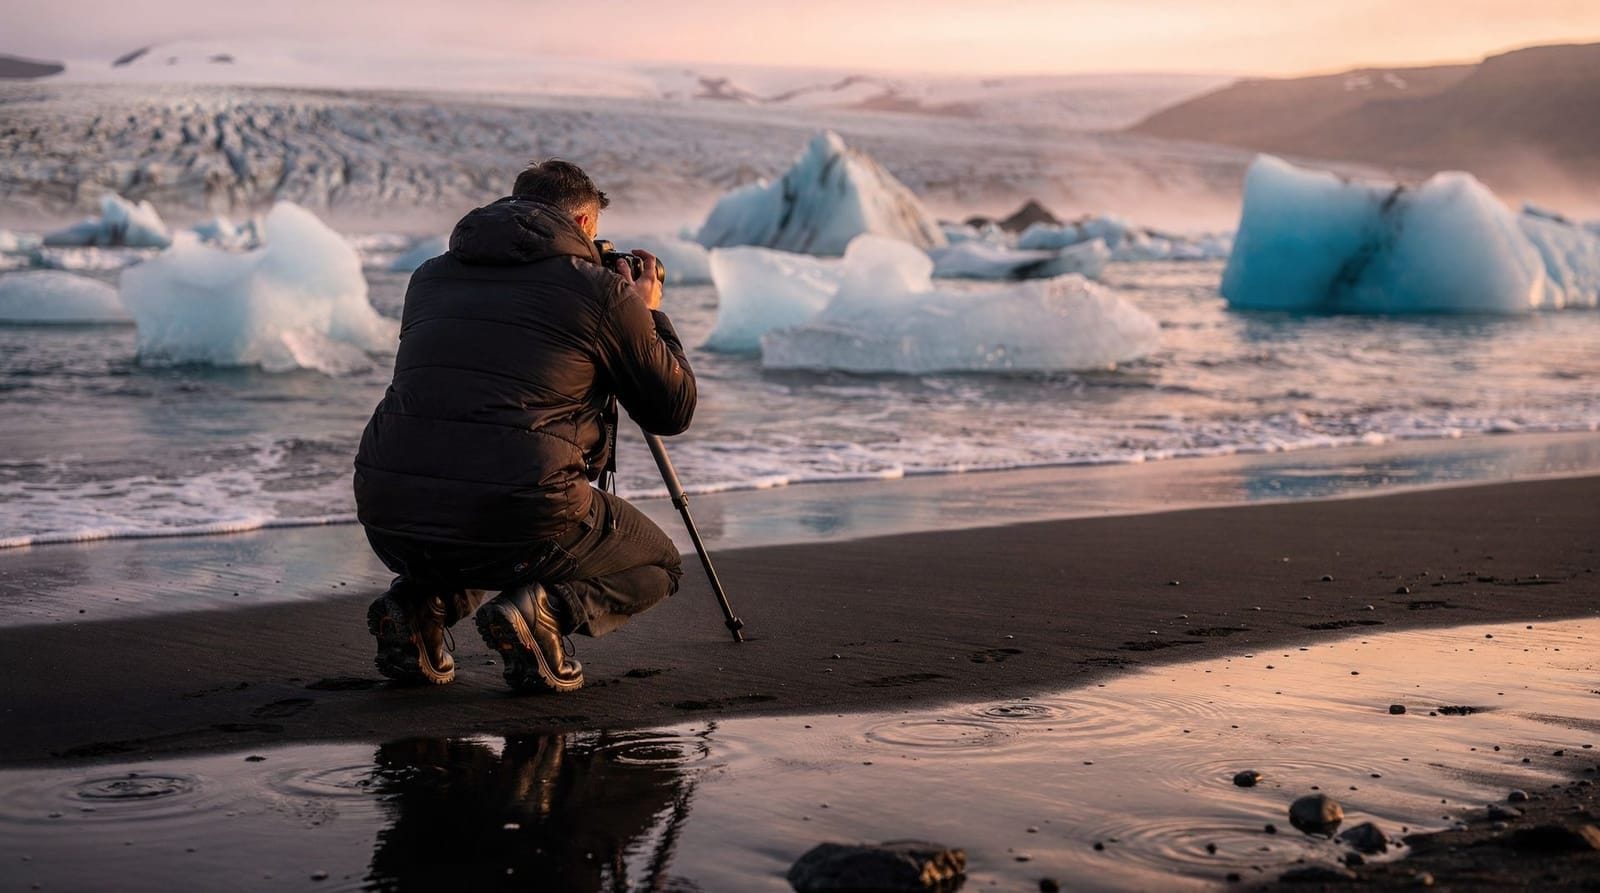
Diamond Beach (Jökulsárlón) in winter is extraordinary — icebergs against black sand, potential frost crystals on the ice, and possible aurora overhead. This is one of Iceland’s signature photography locations year-round, but winter adds a starkness that summer lacks.
February to April (aurora season with returning light)
February and March are increasingly popular for photography. Days are noticeably longer than deep winter, golden hour is 40–60 minutes, and the winter landscape is still fully expressed. Aurora activity is statistically high around the March equinox. Ice caving at Vatnajökull is available through March.
April marks the transition — snow begins retreating, roads open progressively, and Iceland starts its green resurgence. Early April still has sufficient darkness for aurora; late April does not.
May to mid-August (midnight sun)
Iceland in summer looks extraordinary under the midnight sun, but presents challenges for photographers. The sky never fully darkens — the soft orange light at “midnight” is beautiful but repeats exactly the same quality every night with no variation. Aurora is impossible. Long-exposure photography requires very strong ND filters even after midnight.
The main summer photography opportunities: dramatic waterfalls at maximum flow, puffins at Látrabjarg from May to August, lupine fields in bloom, and the extreme light quality at 01:00–03:00 during the golden “midnight” period.
Essential Iceland photography locations
Waterfalls
Iceland has more notable waterfalls per square kilometre than almost anywhere on Earth. The four essential waterfall locations for photographers:
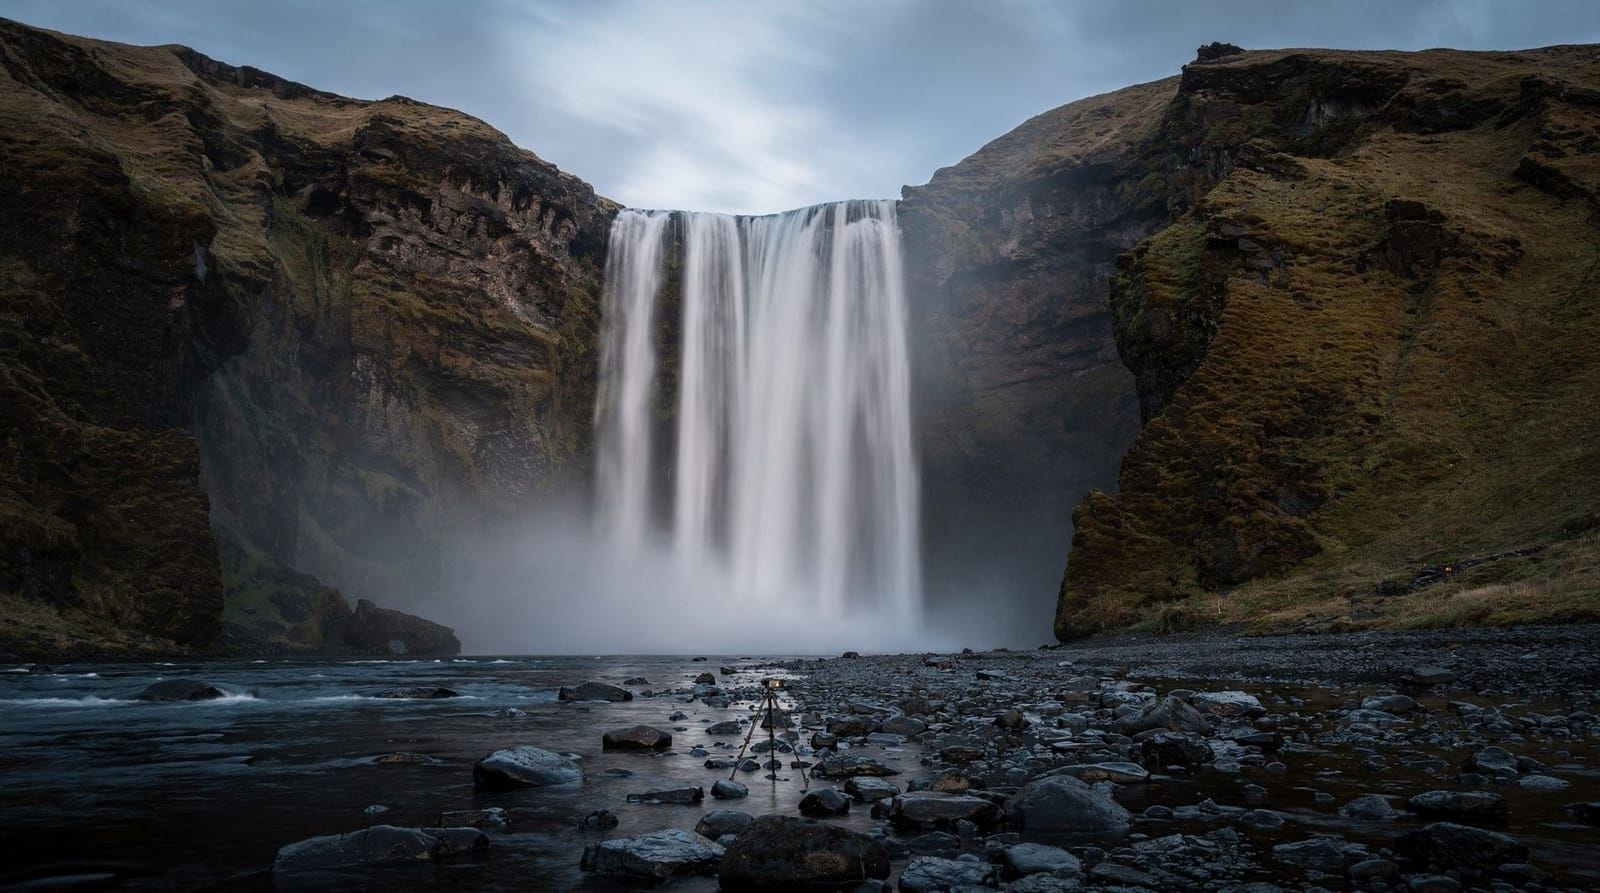
Skógafoss: Wide, dramatic, and endlessly photogenic. Steps to the right lead to an elevated viewpoint. The river below the falls has good foreground texture. Spray range is significant — bring a lens cloth.
Seljalandsfoss: Unique because you can walk behind it. The backlit view through the water curtain is one of Iceland’s signature shots. At sunset with warm light coming through: exceptional. In winter, ice formations on the walk-behind path add texture but the path may be closed for safety.
Dynjandi: The Westfjords’ centrepiece waterfall. Accessible from late spring through autumn. The approach walk passes five smaller cascades before the main falls. Less visited than South Coast waterfalls — better for unobstructed compositions.
Dettifoss: Europe’s most powerful waterfall in terms of water volume. Brutal force, grey glacial water, and dramatic gorge. Photographs work best in overcast light that evens out the harsh contrasts. Approaching from the east side gives a better perspective for the gorge.
For technique at all of these, see long-exposure waterfalls.
Glaciers and ice
Jökulsárlón glacier lagoon: The floating icebergs against a dark sky — with aurora in winter or with the warm setting sun in autumn — is Iceland’s most-replicated photography scene. The lagoon is 375 km from Reykjavík, making it a day trip from the South Coast or a Ring Road stop.
Diamond Beach: Across Route 1 from Jökulsárlón, stranded icebergs on black sand. The wave action constantly repositions the ice, so no two visits produce the same composition.
Vatnajökull glacier face: Guided glacier hikes on Sólheimajökull or Falljökull put you on blue ice with crevasses — conditions for abstract ice photography that cannot be replicated elsewhere in Europe.
Coastlines and volcanic landscapes
Reynisfjara: Black sand beach with basalt column stacks (Reynisdrangar) rising from the surf. The basalt column caves on the left side of the beach are a distinctive foreground. Note: sneaker waves at Reynisfjara are a documented safety hazard — maintain safe distance from the water.
Reykjanes Peninsula: Active geothermal area with the Fagradalsfjall volcano visible from nearby hills. The peninsula’s lava fields, fumaroles, and coastal cliffs offer industrial-scale geological drama.
Mountains and Highlands
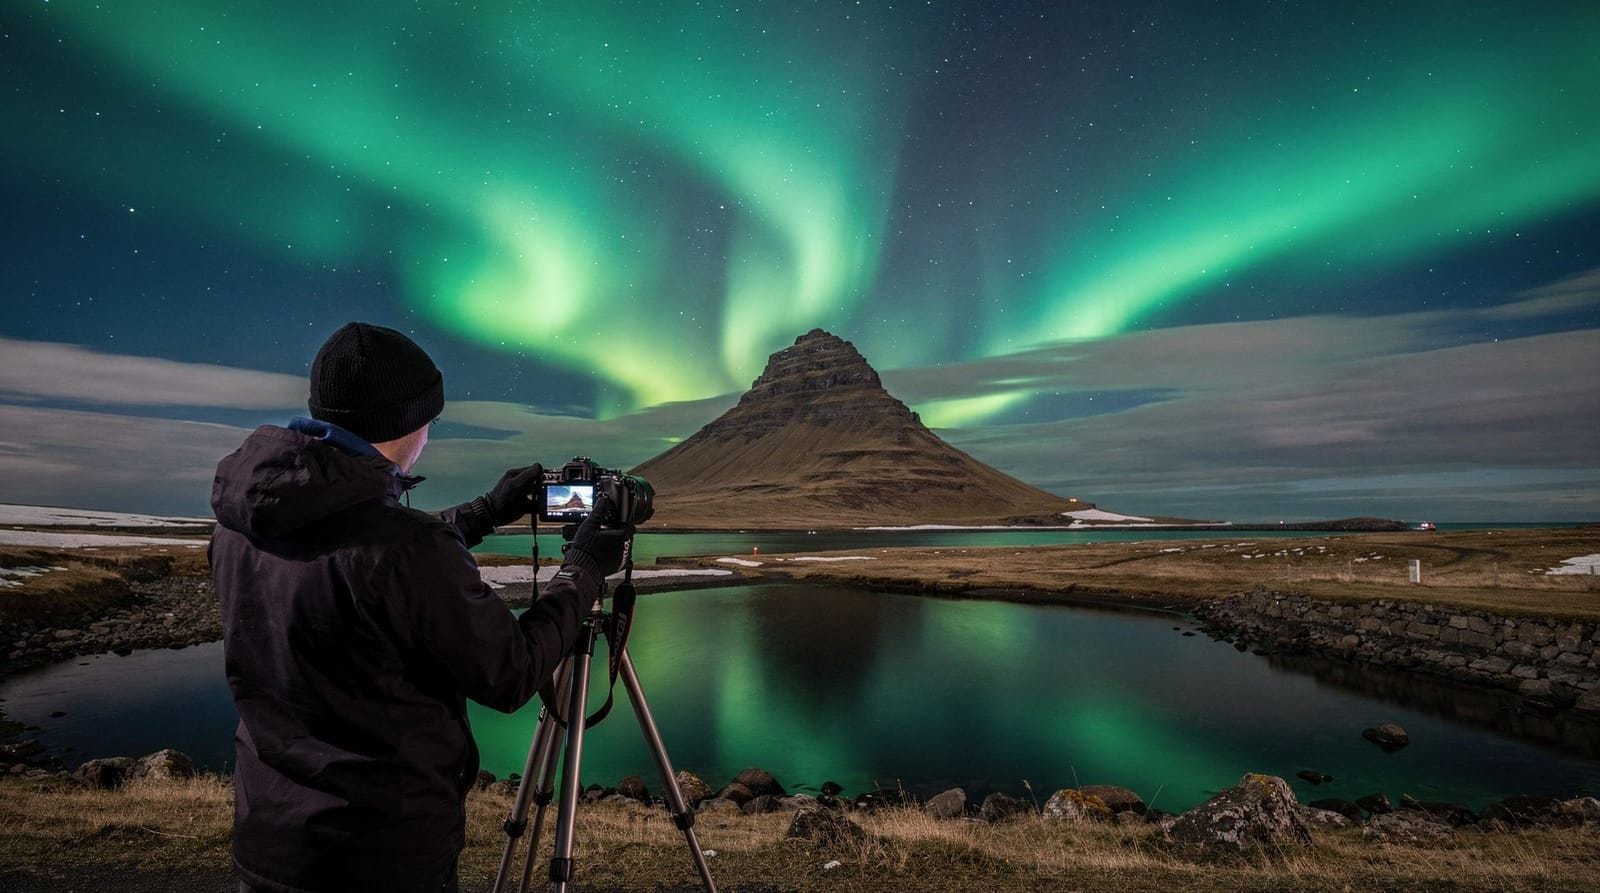
Kirkjufell: Iceland’s most photographed mountain. The isolated conical shape above the Kirkjufellsfoss waterfall has become globally iconic, particularly with aurora photography. The viewpoint is obvious from the road. Arrive at golden hour or wait for aurora in winter.
Landmannalaugar rhyolite mountains: Accessible only in summer (F-road). Striped orange, red, and green rhyolite hills are among Iceland’s most distinctive landscapes. The Landmannalaugar hiking area also has geothermal pools where steam creates atmospheric misty foregrounds.
Protecting your gear in Iceland’s specific conditions
Iceland’s weather creates equipment challenges that differ from typical landscape photography environments. The combination of salt spray, rapid temperature swings, volcanic dust, and wind-driven precipitation requires specific protective habits beyond standard camera care.
Salt spray: Coastal photography — which dominates Iceland’s accessible locations — exposes equipment to salt-laden air at Reynisfjara, the Reykjanes Peninsula, and along the entire South Coast. Salt is corrosive to lens coatings and metal components over time. After every coastal session, wipe the lens, body, and tripod with a dry cloth. Never put a salt-sprayed lens away without wiping it. For extended coastal shoots, a rain cover over the camera body reduces salt accumulation on the body seams.
Volcanic ash and dust: Near the Fagradalsfjall Volcano area and on the Reykjanes Peninsula, fine volcanic dust is present on roads and in the air during dry windy days. This dust is abrasive to lens elements and damaging to sensor surfaces if it enters the body during lens changes. Avoid changing lenses in open air in these areas. Use a vehicle interior as a protected lens-change environment.
Condensation management: The temperature differential between outdoor cold and indoor warmth causes condensation on optics when moving between environments. A camera that goes from -5°C outside to a 20°C vehicle interior will fog immediately. Seal the camera in a resealable plastic bag before entering any warm space. The condensation forms on the outside of the bag rather than on the equipment. Wait 20–30 minutes before opening and using the camera inside.
Battery cold performance: At -5°C to -10°C, lithium battery capacity drops 30–50%. At -15°C or below, batteries can appear completely dead but recover capacity when warmed. Keep all spare batteries in an inner breast pocket. For extended cold sessions (aurora hunting), three spare batteries allows a full night of shooting even with severe capacity reduction.
Technical considerations for Iceland photography
Exposure for overcast vs. bright conditions
Iceland’s skies are frequently white overcast. This produces flat, low-contrast light that is challenging for dramatic landscape photography but good for waterfall long-exposures (no harsh shadows). When overcast, expose to the right — slightly brighter than the meter suggests — to lift the foreground detail.
On sunny winter days, the low sun angle creates extreme contrast between lit snow and shadows. Graduated ND filters or HDR (multiple exposures) help manage this range.
Wind management
Iceland’s coastal winds regularly exceed 60 km/h. Lightweight tripods become impractical. Hang your camera bag from the tripod centre hook as ballast. Use a cable release or 2-second timer to avoid vibration from the shutter button. Keep body shots wide enough that a few pixels of motion blur are masked.
White balance
Grey skies tend to produce bluish casts. Set custom white balance manually or adjust in RAW post-processing. Golden hour and sunset shots benefit from leaving white balance slightly cool (5000–5500K) to preserve the blue sky-to-gold sun gradient.
Post-processing Iceland shots
Iceland’s RAW files often benefit from: lifted shadows (dark lava and basalt absorb a lot of light), slightly enhanced blue channel in skies, and careful use of dehaze for misty waterfall scenes. The distinctive teal-and-orange landscape colour palette (blue sky, orange sand, teal water) is naturally present in Iceland — do not over-amplify it in post-processing.
Logistics for photography in Iceland
Car setup
A rental SUV with a large boot allows keeping a camera bag accessible without packing and unpacking. Park as close to shooting locations as road conditions allow. Keep a dry bag or waterproof case in the car for wet weather.
Time management
Golden hour in October is at 08:30–09:30 and 17:00–18:00. Allow 30–40 minutes of driving time plus 15 minutes of setup time before the light peaks. Many Iceland photographers use The Photographer’s Ephemeris (TPE) app to plan sun angles relative to specific locations.
Guide to photography workshops
Several professional photographers offer 5–7 day Iceland photography workshops, typically priced at €2,500–€5,000. These small-group workshops provide location and technique guidance and are particularly valuable for photographers new to landscape shooting in challenging conditions. They run primarily in October, February, and March.
Working with Iceland’s wind
Wind is the defining challenge of photography in Iceland. Coastal winds regularly exceed 60 km/h, and gusts of 80–100 km/h during Atlantic storms are not exceptional. Understanding how wind affects photography — and developing habits to manage it — determines the quality of long-exposure work in Iceland more than any other environmental factor.
Tripod strategy. The standard advice — hang your camera bag from the tripod hook as ballast — works up to about 50 km/h. In stronger winds, the bag itself swings and introduces vibration. A better technique for very windy conditions: lower the tripod to minimum height, place it close to the ground, and press the legs firmly into soft terrain if available. A low-profile setup has a much smaller surface area exposed to the wind than a full-height tripod.
Mirror lock-up (for DSLRs) and electronic shutter (for mirrorless). The mechanical vibration from a DSLR’s mirror slap is amplified by wind. Enable mirror lock-up for exposures between 0.3 and 2 seconds — the range where mirror slap vibration coincides with shutter duration. Mirrorless cameras with electronic shutters eliminate this entirely. For aurora and waterfall photography specifically, the electronic shutter advantage of modern mirrorless bodies is tangible in Iceland’s conditions.
Body position. Your body acts as a wind break. Position yourself so the wind hits your back and the camera is sheltered on the leeward side. This is not always possible with a fixed composition, but when it is, it reduces tripod vibration measurably.
Cables and straps. Camera straps are liabilities in wind — they flap against the camera body and can knock a lightweight camera off a tripod. Remove the strap or tuck it securely when shooting in wind. Similarly, filter holders with loose-fitting filters can vibrate against the lens in extreme conditions, producing a rattling vibration blur that is difficult to identify.
Shooting windows. Iceland’s wind is not constant. Weather apps, including vedur.is, show hourly wind speed forecasts. In winter, wind often drops overnight as pressure systems pass — the 02:00–05:00 window after a frontal passage can produce calm, clear conditions. Planning a shooting session around these wind lulls is more effective than fighting 70 km/h gusts. The aurora forecast explained covers how to read Iceland’s weather maps for cloud and wind simultaneously.
Planning a photography day trip
Iceland’s landscape photography locations are concentrated along accessible routes, but maximising a single day requires specific logistical planning rather than improvisational driving.
The South Coast day trip from Reykjavík: This is Iceland’s most productive photography day. In winter, departing Reykjavík at 08:00 puts you at Seljalandsfoss by 10:00 — arriving just as the low winter sun hits the falls from the south. Skógafoss is 40 minutes further east and works best in the morning before crowds arrive. Reynisfjara beach is 20 minutes from Skógafoss and works in any light. Returning by Dyrholaey for a golden-hour coastal view adds 30 minutes. Total driving: approximately 350 km round trip, fitting entirely into a winter day if you allow 7–8 hours of driving and location time.
The Golden Circle day trip: Þingvellir at sunrise in October has exceptional autumn-light photography potential — the rift valley catches slanting morning light from the east, and the coloured foliage near the Öxará river is at its peak. Geysir-Haukadalur works mid-morning before the coach tour peak. Gullfoss in the afternoon with the sun low in the southwest. This day suits overcast conditions for waterfall work (Gullfoss specifically benefits from flat light).
Snæfellsnes Peninsula: Departing Reykjavík by 07:00, you reach Kirkjufell by 09:00 for morning light. The west side of Snæfellsnes Peninsula — the Arnarstapi lava coast, Snæfellsjökull National Park — is best in the afternoon as west-facing cliffs catch the setting sun. Kirkjufell for a second time at sunset on the return north side. This day is long (7–8 hours of driving) but produces a genuinely diverse set of photographs.
The Photographer’s Ephemeris (TPE) app is the most useful planning tool for timing sun angles at specific locations. Enter a GPS coordinate and the app shows sun and moon rise/set directions and times, with an AR mode that shows the sun’s predicted position overlaid on the landscape. Plan specific compositions ahead of time so you arrive knowing where to stand.
Best photography workshops in Iceland
For photographers who want to accelerate their Iceland learning through instruction rather than independent trial and error, several established workshop operators offer small-group experiences at the highest level.
Iceland Photography Tours: One of the most established Icelandic operators, running 5–7 day workshops priced at €2,500–€4,500. Led by professional Icelandic photographers with deep location knowledge. Workshops run in October, February, and March — the peak aurora and landscape seasons. Typical group size is 6–10 participants.
Northern Lights and Aurora Workshops: Specialist operators offer 3–4 day packages focused specifically on aurora photography, combining evening excursions with daytime instruction on post-processing workflow. These shorter workshops suit photographers with some existing landscape experience who specifically want to develop aurora shooting technique. Prices range from €800–€1,800 for the workshop component (accommodation separate).
One-day photography tours: Reykjavík has several photographers offering guided day tours with instruction, typically covering the South Coast or Golden Circle. Prices range from 15,000–35,000 ISK (€105–€245) per person in groups of 2–6. These suit time-limited photographers who want to maximise one day with professional guidance. Look for operators who specifically list portfolio reviews and camera settings guidance rather than just transport to famous locations.
Self-directed workshop resources: For those who prefer independent learning, the Icelandic Photographic Society (Ljósmyndasamtök Íslands) occasionally runs open workshops. Online resources — notably the work of Icelandic photographers Sigurdur Bjornsson and Juan Diaz — provide extensive free guidance on Iceland-specific post-processing and location selection through their published tutorials and courses.
The best time to use a guided workshop is a first visit when you are not yet familiar with the logistics. On return trips with existing location knowledge, independent shooting generally produces more personally satisfying work because composition decisions are entirely your own.
Frequently asked questions about photography in Iceland
Can I photograph inside the Blue Lagoon?
Yes, but the misty atmosphere creates challenging conditions. Bring a lens cloth. The official Blue Lagoon photography policy allows personal cameras in the bathing area. Commercial photography and video requires prior approval. See the Blue Lagoon guide for visitor details.
What permits are needed for commercial photography in Iceland?
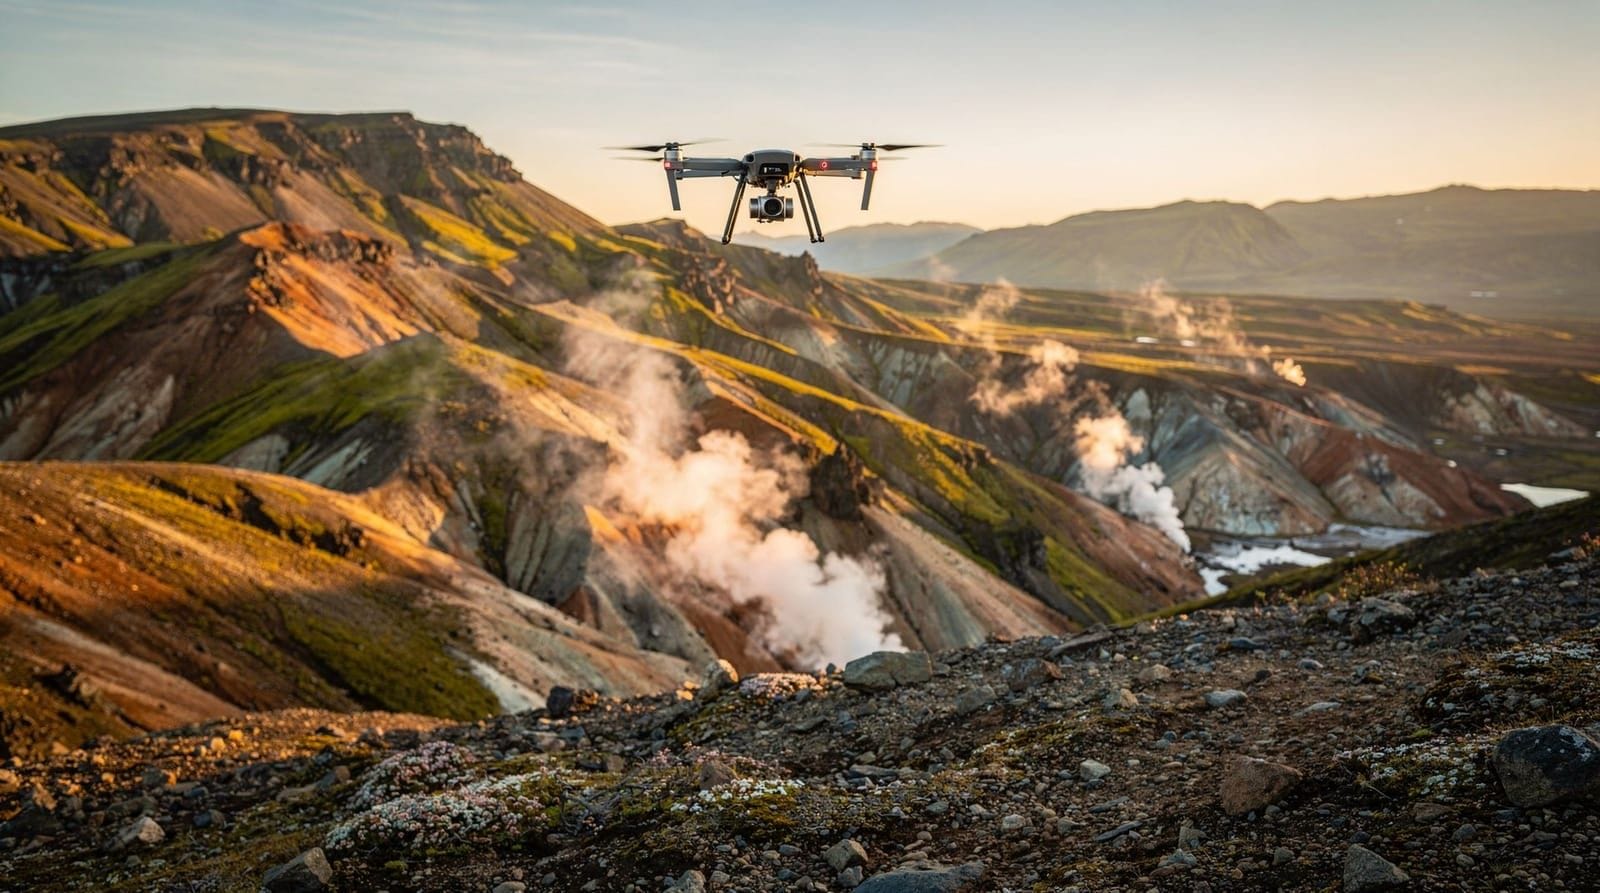
Personal photography requires no permits in Iceland’s public spaces. Commercial photography and film production in national parks requires permits from Umhverfisstofnun (the Environment Agency). The Westfjords area has specific requirements for some locations. For drone photography, see drone rules Iceland.
Are there photography tours in Iceland for beginners?
Yes — several Reykjavík-based companies offer photography day tours aimed at beginners, covering the Golden Circle or South Coast with photography instruction. Prices range from 15,000–30,000 ISK per person (€105–€210) for a full-day small-group tour.
How do I photograph the midnight sun?
The midnight sun works best with a strong foreground and a clear horizon. The sun’s position at midnight is due north in Iceland — compose with interesting foreground to the south and the pale orange sky behind you, or wait for the brief moment when the sun is at its lowest point and the light turns golden. A 10-stop ND filter allows daylight-length exposures even at midnight.
Frequently asked questions about Iceland photography guide
What camera do I need for Iceland photography?
A mirrorless or DSLR with manual controls and weather sealing is ideal. Sony A7 series, Nikon Z6/Z7, and Canon R5/R6 are popular among Iceland photographers. A crop-sensor camera like a Fujifilm XT-5 or Sony A6600 is perfectly capable for landscape work. Iceland's weather is hard on equipment — a weather-sealed body significantly reduces risk.What is the golden hour like in Iceland?
Iceland's high latitude means golden hour is exceptionally long — the sun stays low on the horizon for extended periods in winter. In December, the entire midday period is effectively a prolonged golden hour, with the sun barely rising above the horizon. In October and February/March, you get a 40–60 minute golden hour at sunrise and sunset.How do I protect camera gear from Iceland's weather?
Use a rain cover for your camera and lens (LensCoat, OP/TECH, or a purpose-built cover). Bring a microfiber cloth in an accessible outer pocket for lens spray from waterfalls and sea. Keep spare batteries warm in an inner jacket pocket. Carry a resealable bag for quick protection during rain. Condensation is a bigger issue than rain — when coming indoors from cold, seal the camera in a bag first and let it warm gradually.Do I need a drone in Iceland?
Drones produce spectacular results in Iceland but require significant paperwork and geographic restrictions. See drone rules Iceland for a full breakdown of permits and no-fly zones. Many of Iceland's most photographed landscapes (national parks, near airports, nature reserves) are restricted. A drone adds creative options but is not necessary for excellent landscape photography.What ND filter strengths should I bring to Iceland?
For waterfall photography: a 6-stop ND (ND64) and a 10-stop ND (ND1000) cover most situations. A 3-stop graduated ND is useful for balancing bright sky against dark foreground in landscape shots. Bring a circular polariser for removing glare from wet rocks and enhancing waterfall colour. See long-exposure waterfalls for technique detail.Is a tripod essential for Iceland photography?
Yes, for waterfalls, aurora, and long-exposure landscapes. A carbon fibre tripod rated for wind is ideal — Iceland's coastal winds can blow lightweight tripods over. For wildlife and handheld landscape shooting, a monopod or fast shutter speed substitutes. Leave the tripod in the car when hiking, but take it to every waterfall.
Top experiences
Best-rated activities across GetYourGuide and Viator.